Page 1 of 3 1 2 3 LastLast
Results 1 to 25 of 71

Thread: The 55g low cost reef project

  1. #1
    Apprentice
    Join Date
    May 2008
    Location
    Indianapolis, IN
    Posts
    104
    Thanks
    0
    Thanked 0 Times in 0 Posts

    The 55g low cost reef project

    I've had my 12g nano for about 18 months now, and it's gotten to the point that the upgrade bug has bitten me pretty hard. The hinges on the aquapod broke, and that gave me the excuse to go through with it. One small problem exists, however: we're about to have another baby, my wife's stepping down from her job to be a stay at home mom for a couple years, and we're on a pretty tight budget. After tearing down my 75 gallon a few years back, I knew I could do things differently than last time. Needless to say, she's not thrilled.

    The challenge: prove to her that a reef tank could be put together and maintained without being a money pit. It may not have the best equipment, but I'm ok with that. My plan so far: return the skimmer from my nano (wasn't pulling anything out) that I got for my birthday and get a 55 gallon tank with the LFS dollar a gallon sale for a mere $7 extra. Use the plywood in my garage, including an old bathroom vanity that was just torn out, as most of the wood for the stand that I'm building. Go sumpless, I know I'd rather have one but she doesn't want to worry about plumbing. Everything in/on there will be either built, traded for, or bought at a great deal with the exception of the occasional fish.

    I started this project a little over a week ago, with nothing but a tank and some wood sitting around the garage.


    I built a frame from some plans on Reef Central.


    A few shots of the plywood skin going on:


  2. #2
    Apprentice
    Join Date
    May 2008
    Location
    Indianapolis, IN
    Posts
    104
    Thanks
    0
    Thanked 0 Times in 0 Posts
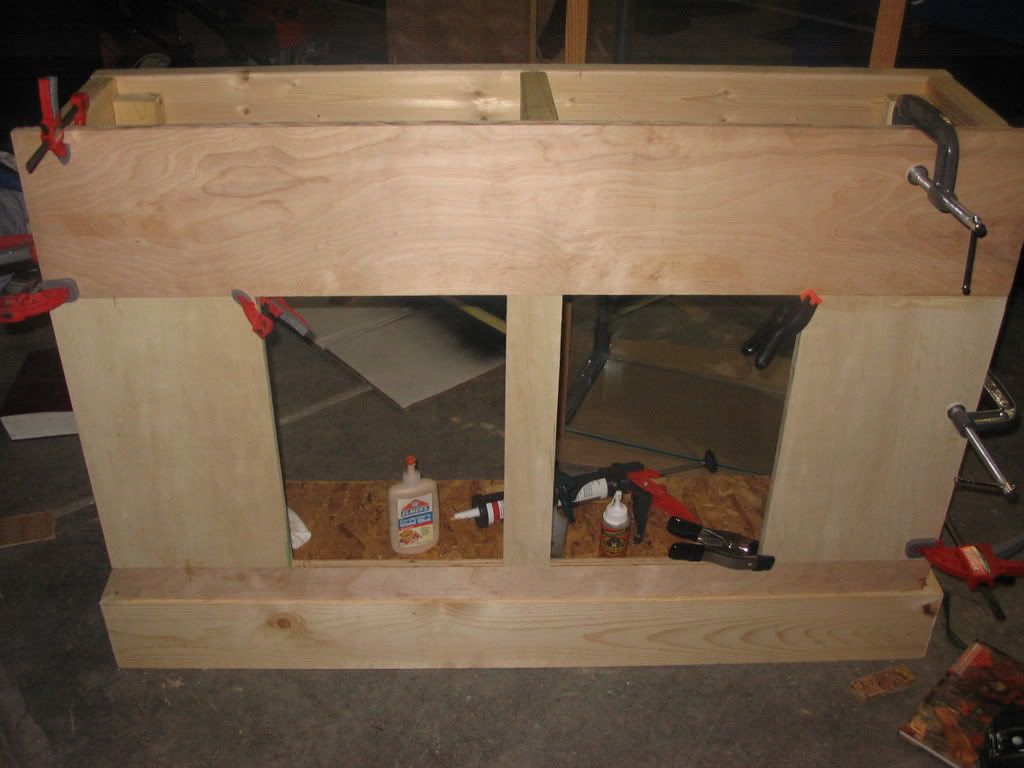
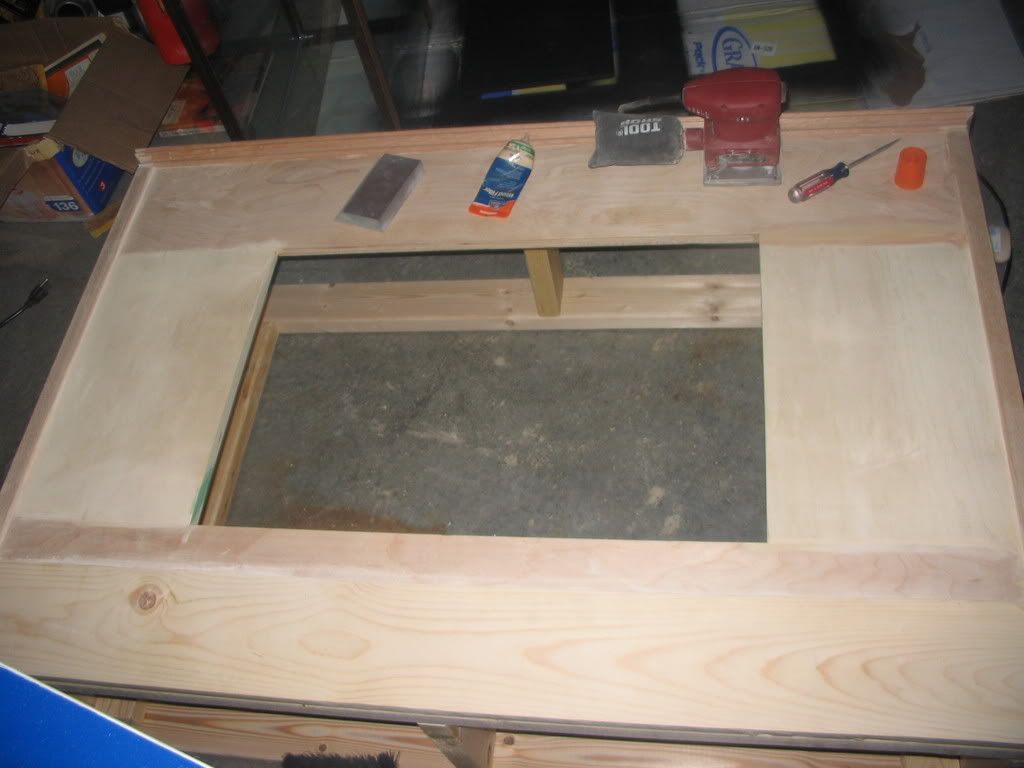
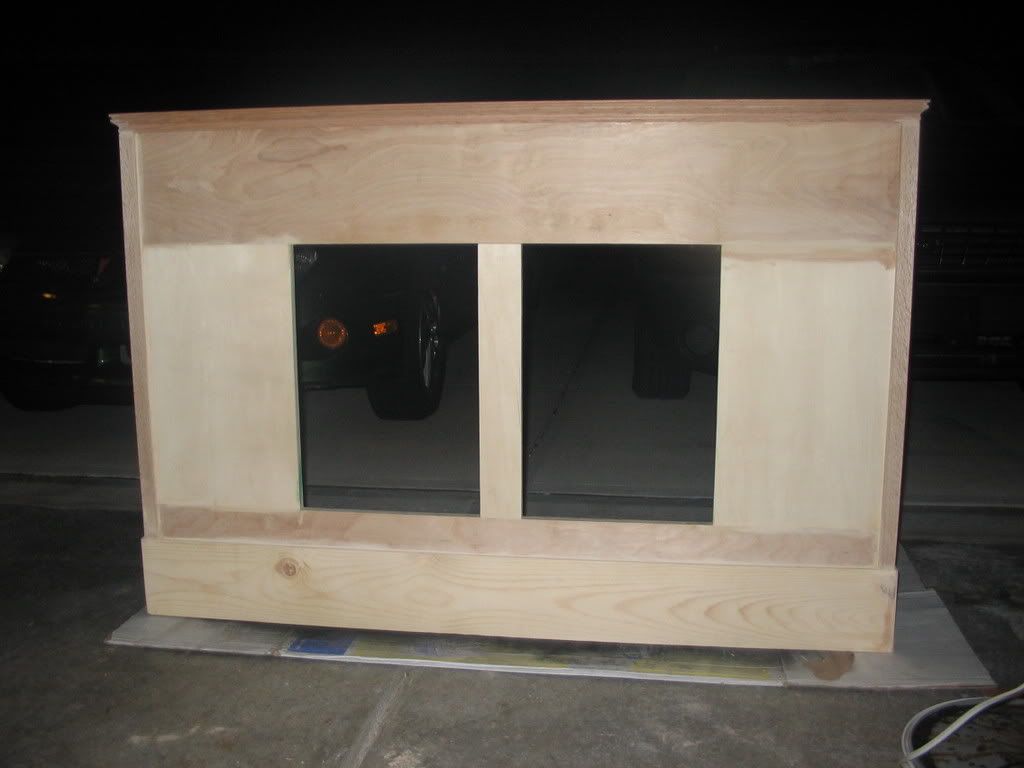
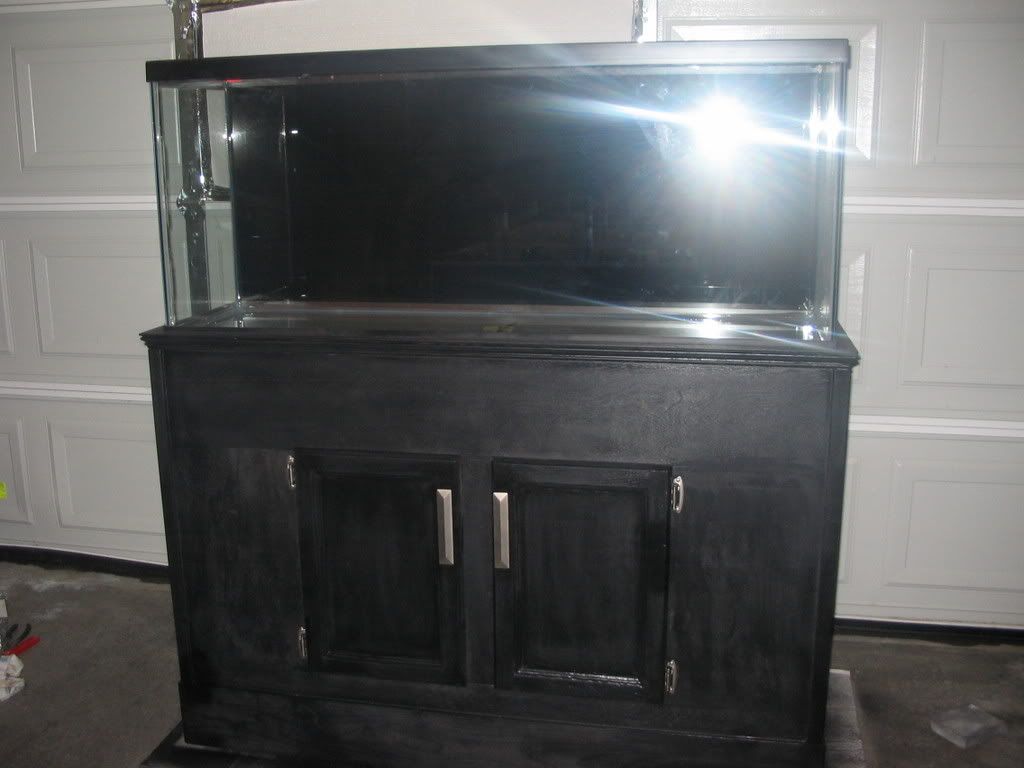
    Trimmed up and ready to paint.


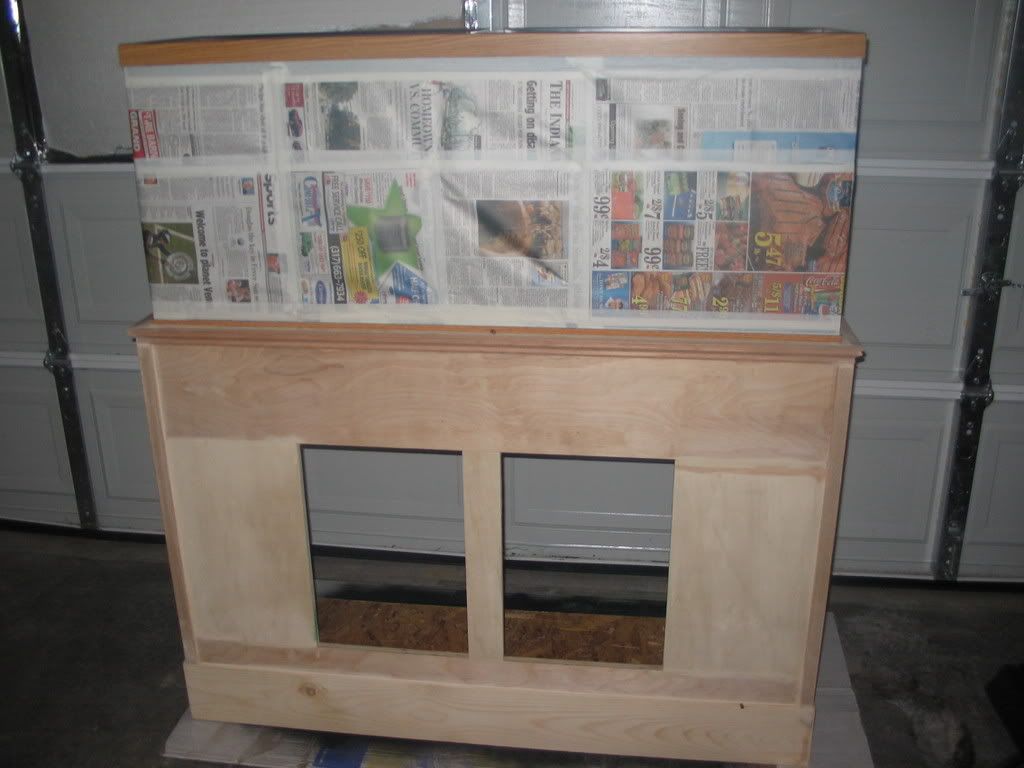
    Whole thing's going to be black, including the back of the tank and the trim. The sale would've been over by the time the LFS was to get another black one in.


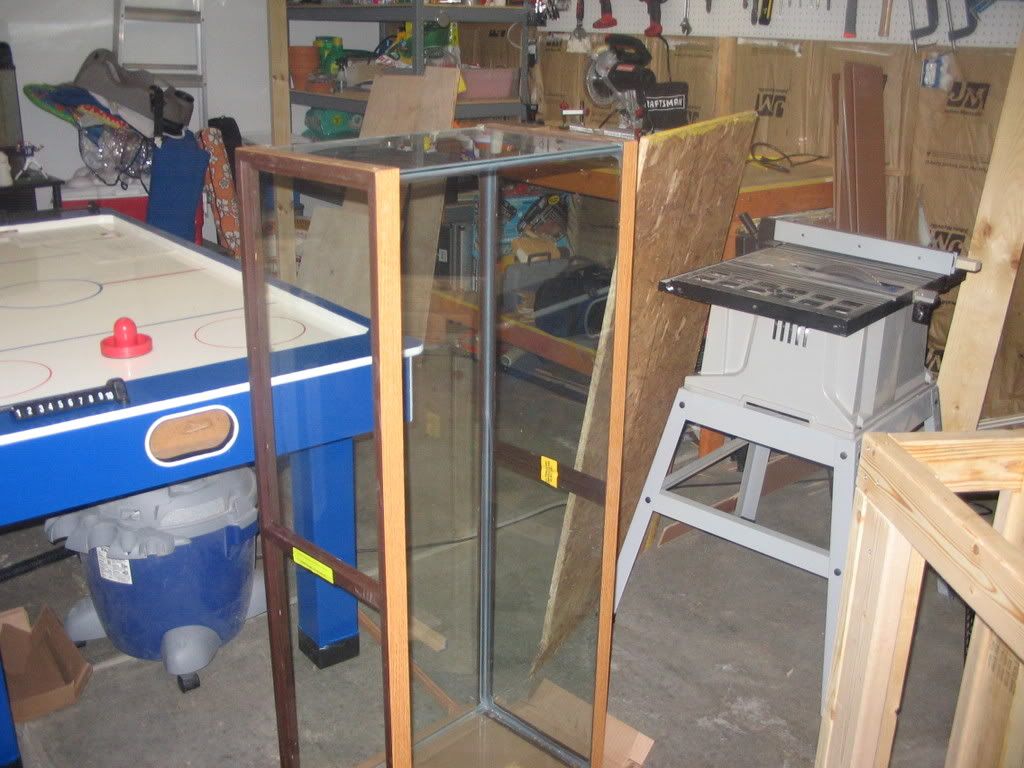
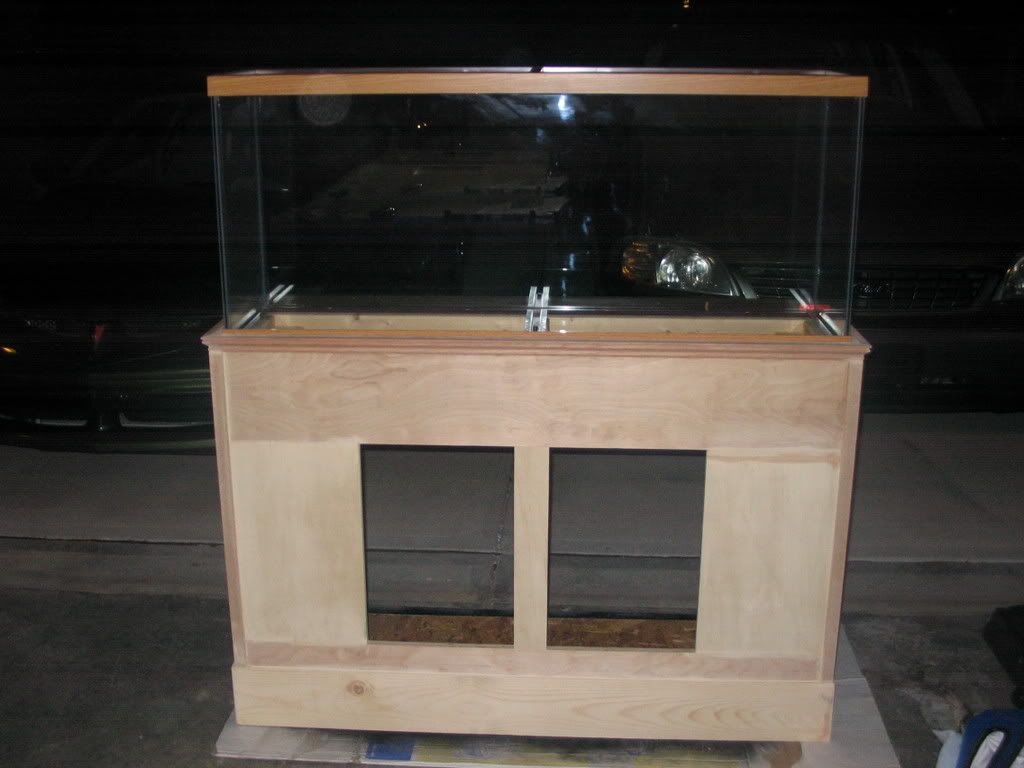
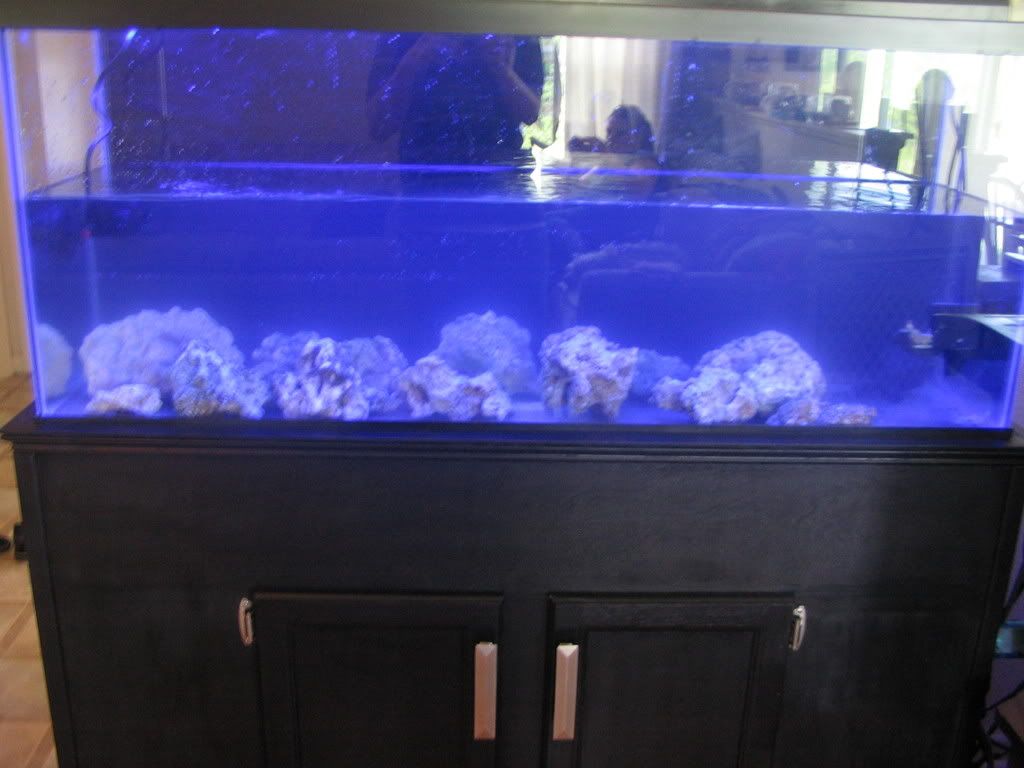
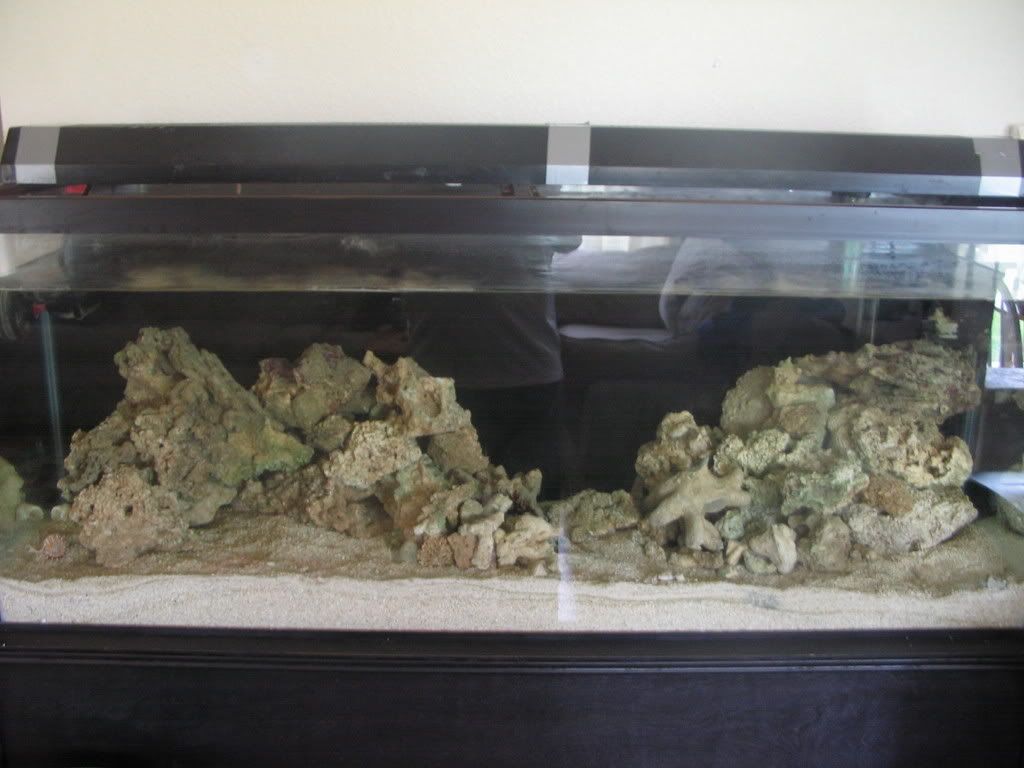
    And here we are today, ready to upgrade. As you can see, I'm pretty excited about my bigger tank.


    The hard part now is transferring everything over without doing any damage. I've been offered a substantial amount of live sand from someone locally, along with some live rock. I'm getting lots of base rock as well, and everything in my nano is going over when I'm sure that the new cycle is complete. Here's the hard part: I can't move the stuff in there until I get a light for it, and I can't afford a light until I sell the nano! I plan on having the tank cycled and ready to go with new sand/rock in there and the flow going until someone agrees to buy the nano, buy the lights with the intention of getting money from the sale, and send the nano off to it's new home at the same time I order my lights. The inhabitants will be ok for a couple days in the dark. I will go skimmerless until I can build up enough cash to get an octopus HOB, and I will see if I can build a HOB fuge. I hope I can keep my promise!

  3. #3
    Curious Reefer
    Join Date
    Jun 2008
    Location
    Northern KY
    Posts
    38
    Thanks
    0
    Thanked 0 Times in 0 Posts
    looks great! did a real good job on the tank and stand.
    still talking to the wife about the nano, i will let you know as soon as i hear something

  4. #4
    Apprentice
    Join Date
    May 2008
    Location
    Indianapolis, IN
    Posts
    104
    Thanks
    0
    Thanked 0 Times in 0 Posts
    Thanks! Even though the hinges broke on the nano, I like the bigger ones I put on the back anyway. Everything in there is growing and extending out so well that I know I'd be out of room sooner than I'd like. I always planned on going bigger sooner or later. Most people with nanos build as if they are keeping it at nano size, maybe I should've done the same. However, when people flat out give you stuff like monti caps, hammer, frogspawn, and millipora (sp?), then you're not exactly going to turn them down. I just put about 7 gal. of water in the new tank so I can put the sand bed in over the weekend and get it going, my source for RO water had his RO system go out yesterday! I have all of this salt and nothing to put it in!

  5. #5
    Assistant Moderator Skurvey Dog's Avatar
    Join Date
    Sep 2006
    Location
    Charleston, SC
    Posts
    1,900
    Thanks
    5
    Thanked 6 Times in 5 Posts
    Hello Dan. I must say that it certainly does make one very pleased and the warm fuzzies to know that they have done a jam up job and saved a nice chunk of change in the process. Stand looks Greattttttt! 
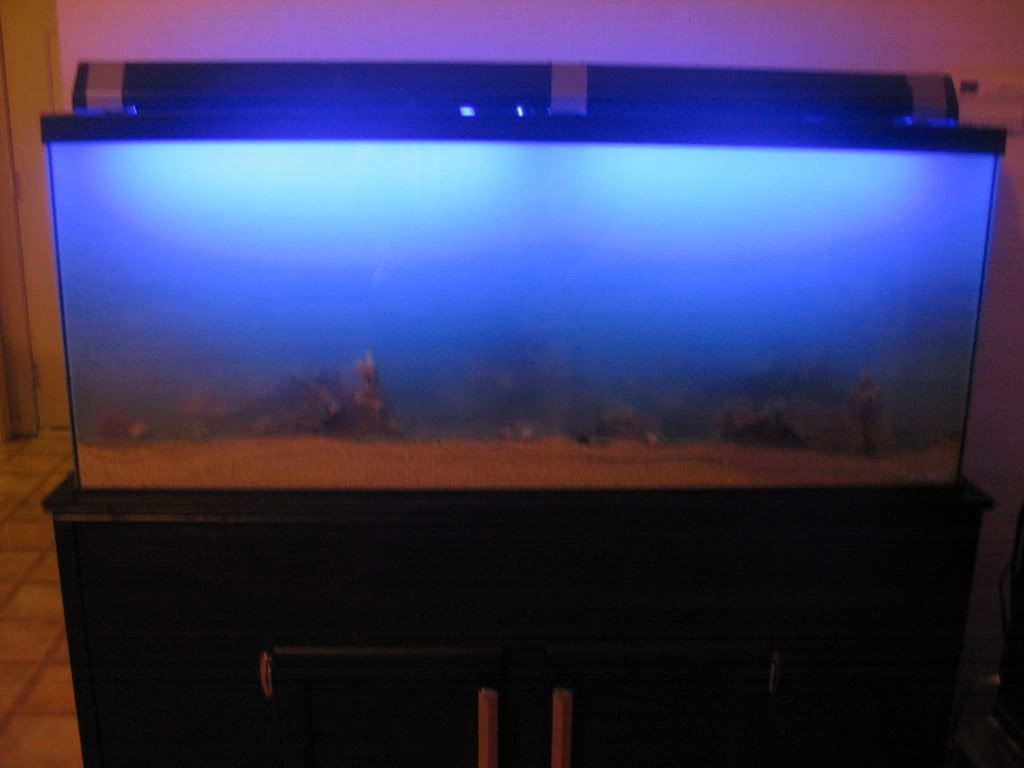
What style of lighting were you looking at to finish off that sleek black?


    Will your voice count?
    One new reefer, another voice united with the many against ignorance and greed. Educate, influence, good stewardship, all in one accord to work together as a whole in saving our reefs.

    "Get Reefy With It!"

  6. #6
    Apprentice
    Join Date
    May 2008
    Location
    Indianapolis, IN
    Posts
    104
    Thanks
    0
    Thanked 0 Times in 0 Posts
    Thanks! I'm looking at a 4 bulb T5 fixture that a guy sells out of his site and on ebay for around 150. Here's the link for it. Looks like a pretty good deal, and I'll probably build a canopy around it to keep stray light in there.

    48" T5HO T5 Aquarium Light Cichlid T-5 Reef Lighting - eBay (item 330250470407 end time Aug-05-08 21:51:02 PDT)

  7. #7
    Expert Reefer thesaent14's Avatar
    Join Date
    Aug 2006
    Location
    miami florida
    Posts
    492
    Thanks
    0
    Thanked 0 Times in 0 Posts
    really nice work i like the stand
    acrylic guru

  8. #8
    Grand Master Reefer CarmieJo's Avatar
    Join Date
    Jan 2006
    Location
    Raleigh, NC
    Posts
    14,980
    Blog Entries
    4
    Thanks
    69
    Thanked 179 Times in 166 Posts
    Nice job on the stand! Does that fixture have individual reflectors? I don't run T5's but I have often read that in order to give you the bang for your buck you need individual reflectors.
    Carmie


    Only disasters happen fast!


    Carmie's 54 Corner Tank
    Carmie's Cube


    Show people you value their advice! Click the STAR icon at the bottom of the post to add to their reputation.

  9. #9
    Apprentice
    Join Date
    May 2008
    Location
    Indianapolis, IN
    Posts
    104
    Thanks
    0
    Thanked 0 Times in 0 Posts
    It doesn't have individual reflectors, but I've read about and seen several T5 systems that run one larger parabolic reflector and do very well. The bottom line is that I can't afford a retro with individual reflectors, and this seems to be the next best thing. Unless I find something great in the internet classifieds, this is what I will likely go with. BTW, thanks for the compliment!

  10. #10
    Apprentice
    Join Date
    May 2008
    Location
    Indianapolis, IN
    Posts
    104
    Thanks
    0
    Thanked 0 Times in 0 Posts
    I put in some base rock I got for free, along with some more water today. I have about 5 gal. of water from the nano in there as well as some rock rubble from the back chambers to get the seeding started. Tomorrow I get lots of sand and some more rock from a local reefer. He's giving me two 5 gallon buckets of sand for free (more if that's not enough to put a DSB in a 55) and about 20 lbs. of rock for $1 per pound. This is all from an established tank. I also got a brand new Koralia 1 in there for $16. I had an old 48" light strip in the garage that I put on there just to see what's going on while I work on it, and it happened to have an actinic 03 bulb in it. It looks pretty cool. I noticed that the water has that distinctive sea smell too.


  11. #11
    Apprentice
    Join Date
    Aug 2007
    Location
    United States
    Posts
    141
    Thanks
    0
    Thanked 0 Times in 0 Posts
    I love it!
    How difficult was making the stand? I have a table saw, electric hand drill, and a drill press, is that all you need to make it? It seems the only other tool used would have been a router on the door, is that correct?
    Also, could you please post a link to the page with the stand plans?
    Thanks!

  12. #12
    Insightful Reefer FishFinder's Avatar
    Join Date
    Nov 2007
    Location
    North Carolina
    Posts
    205
    Thanks
    0
    Thanked 0 Times in 0 Posts

    Looks good

    I like what you've done so far. I can relate to your challenge and goal I went from a 90 reef tank to a 28G Nano. Now I have 2 pretty big reef tanks and my Nano that I use for frags.

    I don't know if you use craigslist.org, but I've found some pretty deals on there. I bought my 55G Sump that I converted to a refugium for $30. It included the stand and tank. I’m looking forward to reading your progress.

  13. #13
    Apprentice
    Join Date
    May 2008
    Location
    Indianapolis, IN
    Posts
    104
    Thanks
    0
    Thanked 0 Times in 0 Posts
    The template is here: Reef Central Online Community - DIY Stands Template and Calculator but I only used that for the 2x4 frame. The only change I made is that I added another blue colored brace at the bottom and put in a shelf. You have to figure out the rest as far as the plywood skin goes, but it's not that hard if you have an idea of what you want it to look like. I looked at lots of pictures on the net to come up with my idea. All it is really is a basic plywood cover with a few changes. I used some old small wood strips to bump out a long 1x6 to look like a bigger piece of wood at the bottom. You can see that in some of the first pictures. The wood I already had was 48" long, but the tank is a bit longer than that, so to avoid ugly wood seams in the front corners I used outside corner trim that BARELY fit. I saw lots of pictures of people using crown moulding at the top of their stands, but that would require more wood on top with much more intricate cutting than I was able to do to create a flat top. I got shoe moulding that widened with a flat top. I also raised it an inch or 2 over the top of the frame so the tank could sit in it rather than on it. The tools I used were the table saw, miter saw, drill (for screws), and I used gorilla glue on the plywood skin to avoid screw holes and wood filler to fill gaps anywhere they were noticable. I also used sandpaper to smooth it out before and after painting. The most important things I would go out and buy are clamps. I got a couple small 90 degree clamps for less than $4 each and they made putting the frame together so much easier. I had to clamp plywood boards together on the front so the panel was smooth where they met. Also, don't make the mistake I did...make sure your 2x4s are straight when you buy them. I had part of it built and it rocked back and forth. This is a part that is supposed to sit flat and level. As far as the doors, I recycled some sitting around from an old bathroom vanity I ripped out while remodeling it. I simply sanded them, painted them black, and bought polished nickel hardware for them. I've never used a router in my life. You can also buy unfinished cabinet doors at any home improvement store for around $25 each. Look for people getting rid of old furniture with doors like entertainment centers in yard sales. I am by no means a good or experienced woodworker so you should be ok too.

    As far as craigslist, I check it every day with the words "fish tank" and "aquarium" in the search bar. My wife sends me to get stuff she finds on that site all the time. That blue air hockey table you see in the first pic is a craigslist buy. I turned it official colts blue for fun. Most people around here sell entire setups for hundreds of dollars. Bad for now, but when I get a bigger house (and a bigger income) that will be a great way to finally get that large tank.

  14. #14
    Apprentice
    Join Date
    May 2008
    Location
    Indianapolis, IN
    Posts
    104
    Thanks
    0
    Thanked 0 Times in 0 Posts

    sand added

    Thanks to a local reef club member, I now have a FREE DSB from a tank that was already running! He wanted to tear the tank down anyway, and said he'd rather have the sand go to a new home than just throw it away. I even have enough left for a fuge. He also hooked me up with some beautiful kaelini live rock for $1 per pound. I put everything in there, and needless to say the water is a murky mess. The bristleworms seem to be digging in the sand just fine, hopefully they'll survive this part of the process. You can also see that there is duct tape on my light fixture now, that's because I got impatient and tried dumping sand in from a bigger container, knocking the light back and to the floor. It still works, but the plastic rivets all broke. The duct tape is the only thing holding it together.


  15. #15
    Apprentice
    Join Date
    May 2008
    Location
    Indianapolis, IN
    Posts
    104
    Thanks
    0
    Thanked 0 Times in 0 Posts

    Cycling!

    Got all the rock and sand working, aquascaping pretty much done, and I've been cleaning out detritus all week, but it's making progress. Since all of the sand and almost half of the rock came out of an established tank, I thought it would be pretty much cycled already. Man was I wrong! Check out these tests!


    The detritus is doing it's job though, it's a nice bacterial food source. Somehow the bristleworms and asterina stars that came with the rock and sand aren't all dying off.

  16. #16
    Assistant Moderator Skurvey Dog's Avatar
    Join Date
    Sep 2006
    Location
    Charleston, SC
    Posts
    1,900
    Thanks
    5
    Thanked 6 Times in 5 Posts
    Yes sir! Nothing like feeling an excitement like you did when you were 8 years old on Christmas morning! :-) The only thing that has changed is the price of the toys. Everything seems to be coming along nicely for you. A big score on the LS and LR my friend. Of course there will always be some type of cycle when setting up a new system, cured LR or not. Things look very good and you're on your way!


    Will your voice count?
    One new reefer, another voice united with the many against ignorance and greed. Educate, influence, good stewardship, all in one accord to work together as a whole in saving our reefs.

    "Get Reefy With It!"

  17. #17
    Apprentice
    Join Date
    May 2008
    Location
    Indianapolis, IN
    Posts
    104
    Thanks
    0
    Thanked 0 Times in 0 Posts
    Thanks SD! Tell me about the expensive toys, due to my job my other hobby is home theater. Not the right hobbies for a cash strapped person, huh? Anyway, I just noticed something else. There is now a cerith snail on the glass close to the sandbed. Even with those readings, he's been in there for 5 days now, should I leave him in or move him into the nano for the time being?

  18. #18
    Assistant Moderator Skurvey Dog's Avatar
    Join Date
    Sep 2006
    Location
    Charleston, SC
    Posts
    1,900
    Thanks
    5
    Thanked 6 Times in 5 Posts
    Everybody to Mits pad to view the latest releases from BB Video! I'll bring the pop and popcorn.
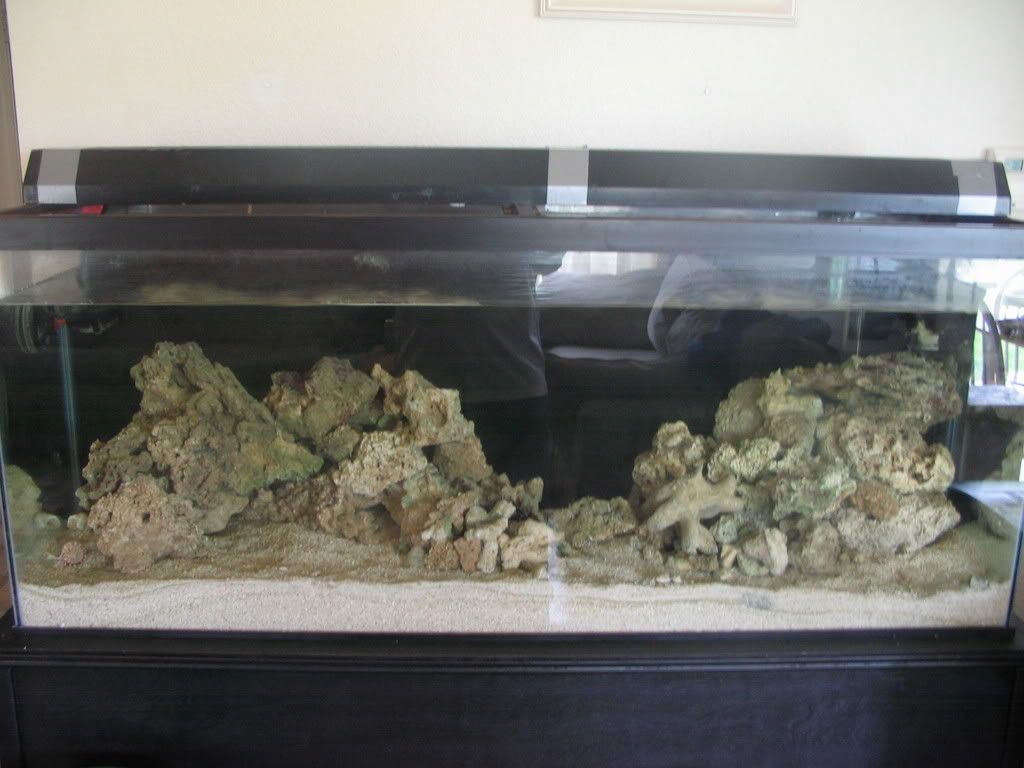
 If you had another established tank available, I would acclimate the snail and put him in there until your big dog finished it's initial cycle. I don't like any creature stressed or made uncomfortable unless there are no alternatives. MHO


    Will your voice count?
    One new reefer, another voice united with the many against ignorance and greed. Educate, influence, good stewardship, all in one accord to work together as a whole in saving our reefs.

    "Get Reefy With It!"

  19. #19
    Apprentice
    Join Date
    May 2008
    Location
    Indianapolis, IN
    Posts
    104
    Thanks
    0
    Thanked 0 Times in 0 Posts
    I've always used my own DIY rocks in tanks I've put together, so this time with the Fiji and Kaelini it's a totally new experience for me. I've never been happy with my old aquascaping, so I looked at lots of pictures and came up with this. I have 2 motivations for the design:

    1. I wanted some sort of a channel in the middle to emphasize fish and give them somewhere spacious to swim.

    2. I'm working a trade for a canopy with a 250 watt MH in it, but only one for now. I can put everything on one half of the tank until I get another one in there. I'm starting on the left.

    I have a cove on the left and a hill/plateau on the right. I'm still going to move a little around (like the rock in the channel) but that's basically it. Every rock with coral in the nano still has to come in as well.


    Let me know what you think and if you have any great ideas tell me!

  20. #20
    Grand Master Reefer rroselavy's Avatar
    Join Date
    May 2006
    Location
    Los Angeles
    Posts
    1,168
    Thanks
    2
    Thanked 2 Times in 2 Posts
    Aquascape looks cool. Could you take a pic with the lights on so we can see the light/dark areas better?

    Kudos for doing this on the cheap. Should be an inspiration for others. Could you write up a list of your costs so far? Just don't show my wife...

    What are your plans for circulation? I do not think one Koralia one is going to be enough. Also, will you be getting a skimmer? HOB Refugium?

    Sorry for all the questions. It will be cool to see your ingenuity as your system continues...

  21. #21
    Grand Master Reefer rroselavy's Avatar
    Join Date
    May 2006
    Location
    Los Angeles
    Posts
    1,168
    Thanks
    2
    Thanked 2 Times in 2 Posts
    Quote Originally Posted by Mits View Post
    Also, don't make the mistake I did...make sure your 2x4s are straight when you buy them. I had part of it built and it rocked back and forth.
    LOL. Definitely not the first time I heard this... The stand looks great. Did you leave an access panel for when you finally change your mind about the sump, so you don't have to break down the tank to install it? Somebody (Melev?) had a homebuilt stand with panel on the end so you could open it from the side. Seemed like a pretty good bit of foresight to me...

  22. #22
    Apprentice
    Join Date
    May 2008
    Location
    Indianapolis, IN
    Posts
    104
    Thanks
    0
    Thanked 0 Times in 0 Posts
    Quote Originally Posted by rroselavy View Post
    Aquascape looks cool. Could you take a pic with the lights on so we can see the light/dark areas better?

    Kudos for doing this on the cheap. Should be an inspiration for others. Could you write up a list of your costs so far? Just don't show my wife...

    What are your plans for circulation? I do not think one Koralia one is going to be enough. Also, will you be getting a skimmer? HOB Refugium?

    Sorry for all the questions. It will be cool to see your ingenuity as your system continues...
    I don't have lights yet, aside from an old actinic tube in a regular old strip fixture. I'm waiting for my tank to cycle to transfer everything over and trade the nano for the light. I was afraid to see the list of costs, but here goes. The tank cost me $55, but all except $7 was done with cash from my birthday, so I'm calling it $7. The materials for the stand were a little more than I expected, about $75 after 2x4s, 1x6, plywood, outside corner trim, shoe trim, primer, paint, and metal hardware. I paid a total of $20 for all of the sand and rock in there, and about another $15 for all of the water. I got IO salt for $8 and a Koralia 1 for $16 (got them at cost!) So that's $141 for everything you see in the picture so far. That's usually the price for a 55 gallon alone at my LFS. Future in the works are a canopy and 250w 6500k Iwasaki MH light in trade for the nano, $50 for a remora pro (minus pump) from a fellow Indy reefer (offset by $20 sale of SCWD and hopefully soon $10 sale of a Hydor Flo) and then I have to find the best deal I can on a Mag 3 or Rio 1400 from the sale boards on various sites. Hopefully I can sell a few items in my garage on craigslist to offset some of this. I would like to find or build a HOB fuge later. Aside from the Koralia 1, I have a heater, powersweep and some other powerhead running that were all sitting around my garage.

  23. #23
    Apprentice
    Join Date
    May 2008
    Location
    Indianapolis, IN
    Posts
    104
    Thanks
    0
    Thanked 0 Times in 0 Posts
    Quote Originally Posted by rroselavy View Post
    LOL. Definitely not the first time I heard this... The stand looks great. Did you leave an access panel for when you finally change your mind about the sump, so you don't have to break down the tank to install it? Somebody (Melev?) had a homebuilt stand with panel on the end so you could open it from the side. Seemed like a pretty good bit of foresight to me...
    The brace between the doors is removable so there is quite a large opening if I need one. I knew I may need this when I had to cut the brace out of the stand on my first tank. I couldn't make a side panel removable for 2 reasons: 1) I suck at woodworking (this stand is easily the best project I have ever put together) and have no idea how to make that happen; and 2) my small children would doubtlessly figure out how to remove it and get into things.

  24. #24
    Apprentice
    Join Date
    May 2008
    Location
    Indianapolis, IN
    Posts
    104
    Thanks
    0
    Thanked 0 Times in 0 Posts
    So I'm looking around the tank with a flashlight to see if there's anything moving around, and I see some feather dusters, copepods, and of course, an aptasia! That's the first I've ever had in a tank and I haven't even added anything yet. Maybe I'll get a peppermint shrimp and see if he eats it once the tank is cycled.

  25. #25
    Apprentice
    Join Date
    May 2008
    Location
    Indianapolis, IN
    Posts
    104
    Thanks
    0
    Thanked 0 Times in 0 Posts
    Lots of stuff in the update, but no pics. Last night I started getting 0/0 readings, so it looks like the cycle is done and stuff can live in there now. I'm not brave enough to put my fish in there yet though. I want to get the water quality up a bit first. On that note, I sold some stuff in the garage and used the money to get some stuff for the tank. Most importantly, I got a Remora Pro skimmer for $50 minus the pump. I bought a Rio 1400 at Premium Aquatics today for around $27 (I love their walk in day) and got the skimmer going tonight. I put a Maxi Jet 900 with sureflow 1600 mod in there, and now I might have too much flow. 2000 gph in a 55 gallon tank, wow. I also got a hydrometer (can't afford the refractometer) and digital thermometer. Last but not least, I got some clean up crew. It consisted of 12 hermits, 12 large nassarius snails, 2 peppermint shrimp, and a brittle star. I was a bit afraid of putting everyone in there, but some hitchhikers have been doing well. I put the new powerhead in there and it really kicked up the detritus that I didn't get cleaned out yet. I hope that didn't mess up the water and hurt the cleaners. I did lose one peppermint shrimp and I haven't seen the other one in a while, that worries me. I have noticed 2 issues though: 1)my salinity was a lot higher than I thought, about 1.029. I have to get some RODI water ASAP and get that number down. 2)the heater I put in is not very user friendly, and when I raised it a little bit the temp went from 71 to 75 in just a few hours. I need to get that nailed down fast. The remora pro is pretty loud too. I hope that a canopy will bring the sound level down, otherwise this will be a part time skimmer. On the bright side, it's already pulling out a good amount of brown foam. Hopefully I can wake up in the morning to a healthy cleanup crew (except for the unfortunate shrimp...RIP).

Page 1 of 3 1 2 3 LastLast

Thread Information

Users Browsing this Thread

There are currently 1 users browsing this thread. (0 members and 1 guests)

Similar Threads

  1. Skurvey Dog's 90G Reef Project
    By Skurvey Dog in forum Member Tank Projects
    Replies: 219
    Last Post: 06-11-2009, 07:49 PM
  2. Reef Crystals with low Ca
    By rroselavy in forum Marine Tank Problems
    Replies: 13
    Last Post: 06-19-2008, 07:02 PM
  3. New Reef Project From New Member
    By RSC in forum General Marine Discussions
    Replies: 17
    Last Post: 03-02-2008, 01:43 PM
  4. Replies: 22
    Last Post: 08-04-2006, 09:43 AM
  5. Newbie - Cost of Reef Ready 48-55 Gal Setup
    By Stephen in forum General Marine Discussions
    Replies: 19
    Last Post: 02-13-2006, 06:10 PM

Bookmarks

Posting Permissions

  • You may not post new threads
  • You may not post replies
  • You may not post attachments
  • You may not edit your posts
  •