


 Reply With Quote
Project Details - The Parts:
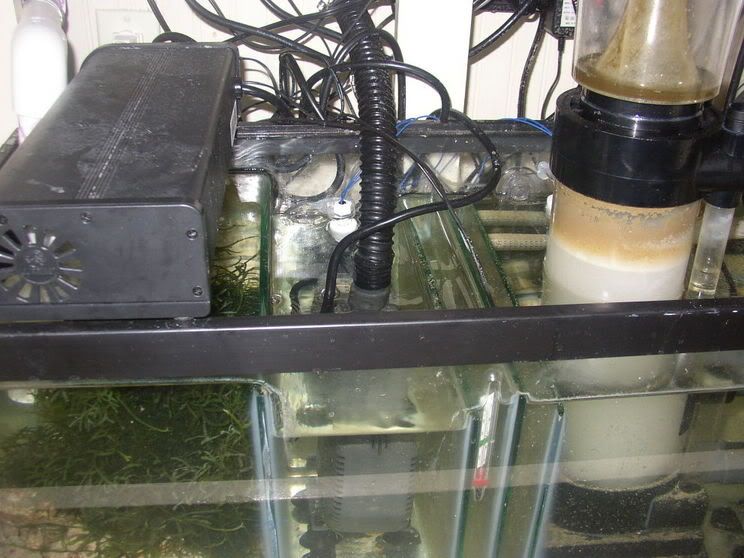
My idea was to put Keep It Simple (Stupid). I tend to get very complex when working of things like this. So I decided to install the smallest pump I could find to deliver the water to the sump. I choose to go with the Hydor Pico. The Pico was very small when I got it, about the size of an HP printer cartridge. I used 3/8" hose to carry the water.
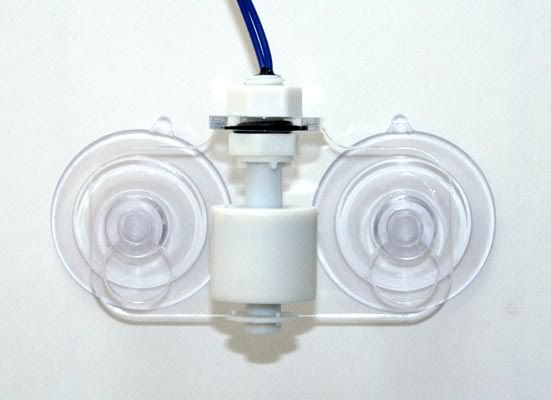
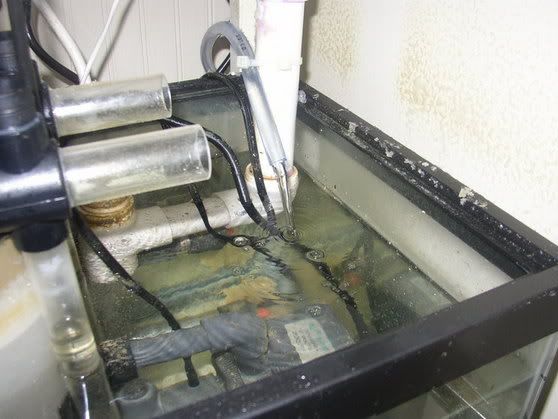
For the control inputs I choose to go with a float switch that I saw on Ebay. I purchased 3 of them.
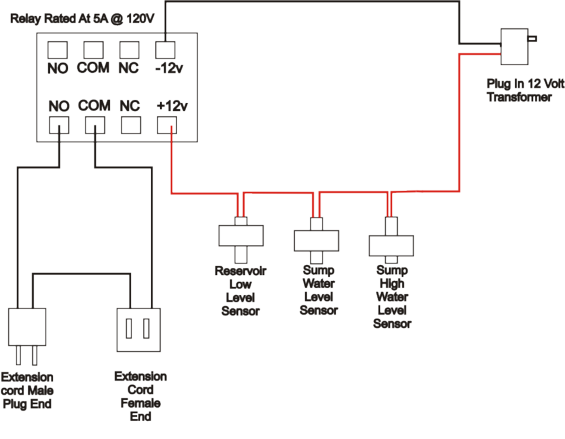
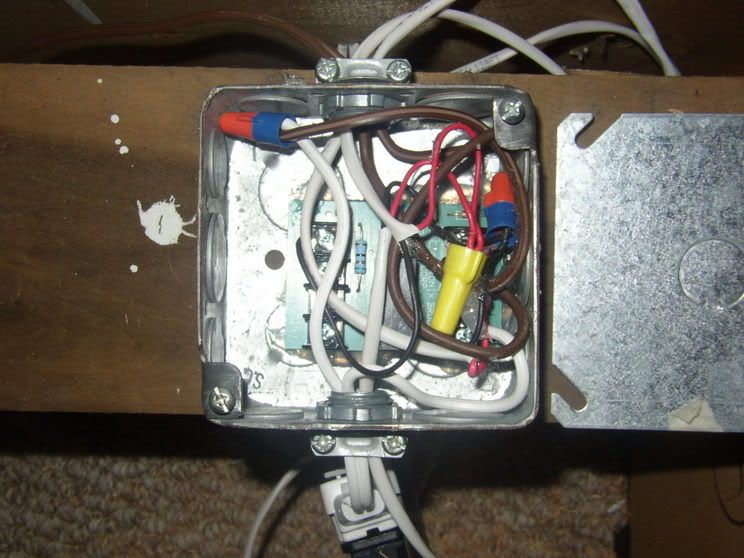
I needed to figure out how I was going to switch the pump (120 volts) on and off. I obviously didn't want to run 120 volts through the switches, although they would handle that. Instead I borrowed a trick I use almost everyday at work...I used a relay.
Whats a relay? A relay is an electrical switch that opens and closes under control of another electrical circuit. So bssically I could run a lower voltage through the float switches and when all three switches were in a "closed" position they would close the switch on the pump circuit turning it on. When one of the float went to an "open" position, the pump would stop. I happened to have the right relay for the job in my garage, a left over taken out of a project that I worked on earlier in the year.
So I had the switches, the relay, the pump, but I needed a lower voltage that would control the relay (through the switches). I founf an old transformer in the garage. It was 12 volts DC, just what the relay required. I also grabbed one of those cheap extension cords to supply my 120 power.
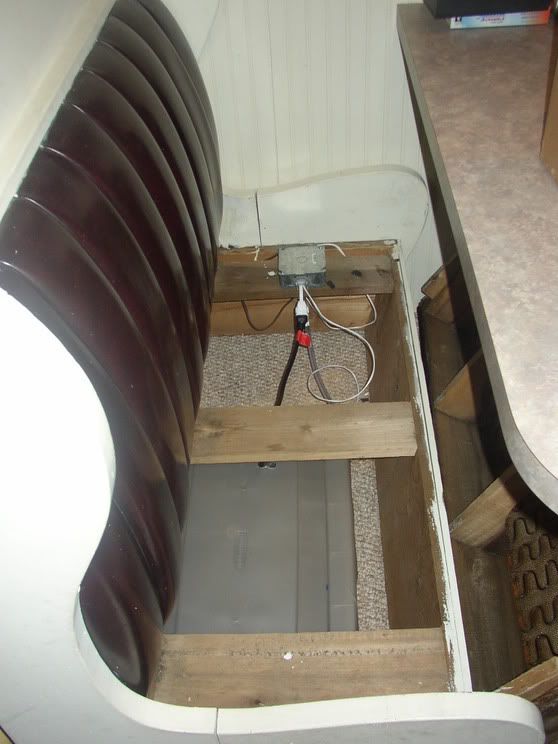
All of the electronics would be housed in a standard electical 4 square box with cover, and I decided to run everything from the reservoir to the sump in a PVC pipe to keep the job clean.
Pump- $12
Container -$4
Hose - $4
PVC Pipe - Free
3 Float Switches - $30 (incl ship)
Wire - Free
Relay - Free
12v Transformer - Free
Not having to put water in the sump everyday - PRICELESS
Total Cost to me: $50


 icon under there name and give them Reputation points


 USA
USA


 Vquilibrium Productions
 dude he was


Bookmarks